Svelte JS Crash course

Svelte JS Crash course
I was writing sveltejs handbook but here we have already published handbook covers everything from https://flaviocopes.com/ You can check Original Copy from the author here https://www.freecodecamp.org/news/the-svelte-handbook/
Book Index
- Introduction to Svelte
- Svelte Components
- Handling State in Svelte
- Svelte Reactivity
- Svelte Props
- Cross-component State Management in Svelte
- Svelte Slots
- Svelte Lifecycle events
- Svelte Bindings
- Conditional Logic in Templates
- Looping in Svelte Templates
- Promises in Svelte Templates
- Working with Events in Svelte
- Where Do We Go From Here
Introduction to Svelte
Svelte is an exciting Web framework that offers a fresh new take on how to build Web applications.

If you are already experienced in React, Vue, Angular or other frontend frameworks you might be pleasantly surprised by Svelte.
My first impression with Svelte was that it all feels so much more like plain JavaScript than working with other frameworks. Sure, you have some rules and there are templates that are not 100% JavaScript (they look more like HTML). But most of the things that are complicated with other frameworks are very simple and lightweight with Svelte.
And my first impression has been confirmed by further usage of the framework and its ecosystem of tools.
Compared to React, Vue, Angular and other frameworks, an app built using Svelte is compiled beforehand so you don't have to serve the whole framework to every one of your site visitors. As a result, the fruition of the experience is smoother, consumes less bandwidth, and everything feels faster and more lightweight.
At deployment, Svelte disappears and all you get is plain (and fast!) JavaScript.
How to get started with Svelte
To use Svelte, you need to have Node.js installed because all the tooling we're going to use is based on Node. Check out my tutorial how to install Node.js if you don't have it already!
And make sure it's the latest version (how to update Node.js).
If you don't want to install Node, the Svelte website provides a very cool REPL (Read-Eval-Print Loop) at https://svelte.dev/repl. It's handy to test small Svelte apps and to experiment with things.
Node installs the npx command, which is a handy way to run Node commands. In particular, we're going to run this:
npx degit sveltejs/template firstappThis will download and run the degit command, which in turn downloads the latest code of the Svelte project template living at https://github.com/sveltejs/template, into a newly created firstapp folder.
Make sure that git is installed on your machine and added to the PATH variable, otherwise the degit command won't work. In case things are still not working out for you, you can alternatively 'Clone or download' the template project and then delete the hidden .git folder. This is basically the same thing that the degit command does (only difference is that the folder is called template instead of firstapp).
Now go into that firstapp folder and run npm install to download the additional dependencies of the template. At the time of writing, these are the dependencies of that project template:
"npm-run-all"
"rollup"
"rollup-plugin-commonjs"
"rollup-plugin-livereload"
"rollup-plugin-node-resolve"
"rollup-plugin-svelte"
"rollup-plugin-terser"
"svelte"
As you can see, it's the Svelte core, plus Rollup (a Webpack alternative) and some of its plugins. Plus npm-run-all, a CLI tool that is used to run multiple npm scripts in parallel or sequential.
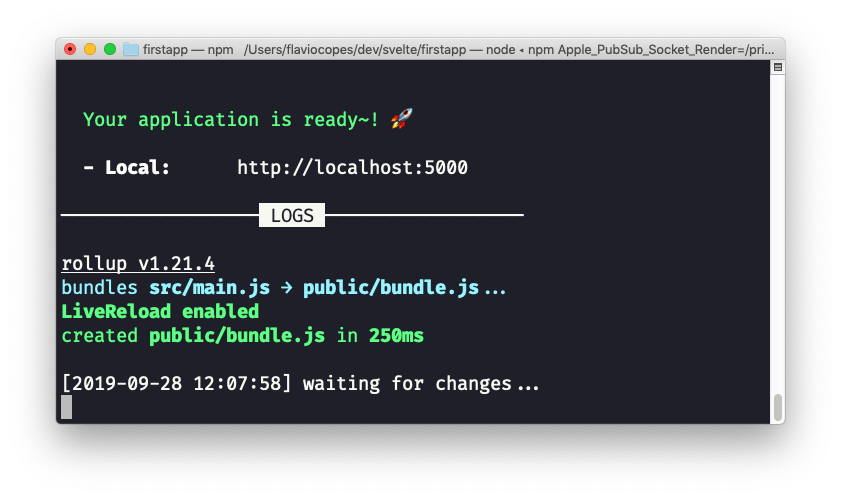
We're now ready to run our Svelte site in development mode, by running
npm run devThis will start the app on localhost, on port 5000, by default:
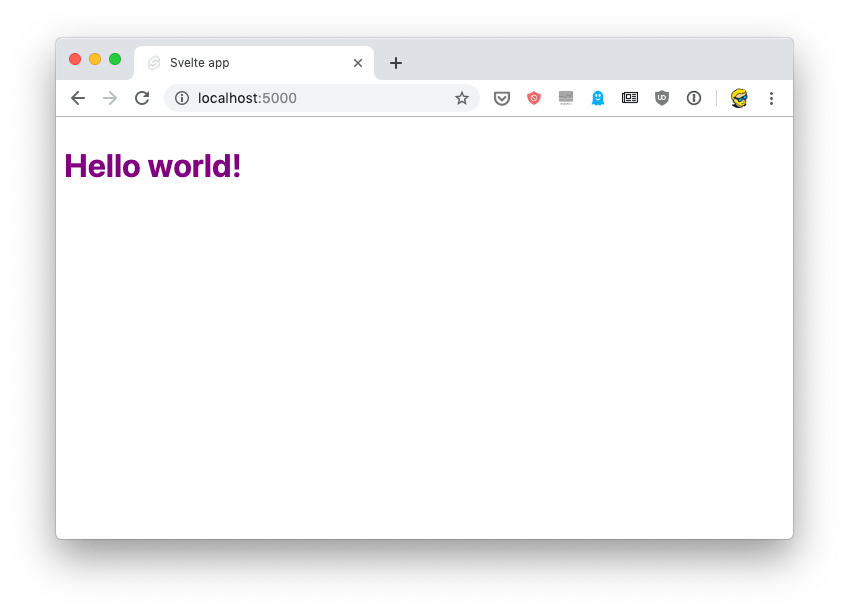
If you point your browser there, you'll see the "Hello world!" example:
You're now ready to open the code in your favorite editor. The src folder contains all you need to tweak the app: the main.js file:
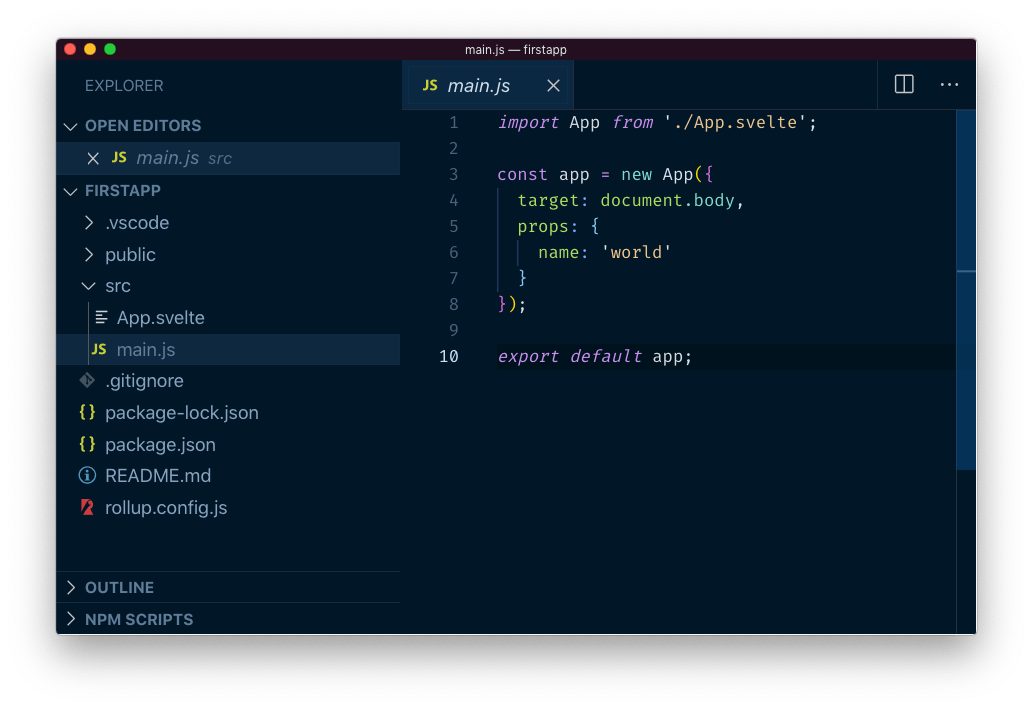
This file is the entry point and in this case initializes the App component, which is defined in App.svelte, a single file component:
<script>
export let name;
</script>

<style>
h1 {
color: purple;
}
</style>

<h1>Hello {name}!</h1>
Svelte components
Modern Web development is very much focused on components, and Svelte is no different.
What is a component? A component is an atomic part of the application that is self-contained and optionally references other components to compose its output.
In other words, it's a compartmentalized part of the application. A form can be a component. An input element can be a component. The whole application is a component.
Svelte components contain all that's needed to render a piece of the UI. Every Svelte component is declared in a .svelte file, and in there you'll find the content (markup), the behavior (JavaScript), and the presentation (CSS) without having to define separate files.
Which is a sane way to define a piece of the UI because you don't need to search for the items that affect the same element across various files.
Here's a sample component, which we'll store in a file called Dog.svelte:
<script>
export let name;
</script>

<style>
h1 {
  color: purple;
}
</style>

<h1>The dog name is {name}!</h1>
Any JavaScript must be put in the script tag.
The CSS you have in the style tag is scoped to the component and does not "leak" outside. If another component has an h1 tag, this style will not affect that. This is very handy when reusing components you already wrote for other applications, for example, or when you include Open Source libraries published by other people.
For example, a few weeks ago I included a date picker component built with Svelte in an application and none of the stylings of the component leaked outside of it, and none of the CSS I wrote into the app modified the look of the date picker.
Importing the component in other components
A component can, as said, be used by other components.
Other components can now import the Dog component in their code.
For example here's a House component, defined in a House.svelte file, in the same folder of Dog.svelte:
<script>
import Dog from './Dog.svelte'
</script>
You can now use the Dog component like an HTML tag:
<script>
import Dog from './Dog.svelte'
</script>

<Dog />
Exporting specific functions from a component
As you saw above, to export the component we didn't have to do anything, because the component itself is the default export.
What if you want to export something other than the component markup and its associated and built-in functionality?
You must write all the functions you want to export from a special script tag with the context="module" attribute.
Here's an example. Say you have a Button component in Button.svelte:
<button>A button</button>and you want to provide other components the ability to change the color of the button.
A better solution for this use case is to use props, which is something we'll talk about in the next chapter. But stick with me for this example
You can provide a function, called changeColor.
You write and export it in this special script tag:
<script context="module">
export function changeColor() {
  //...logic to change color..
}
</script>

<button>A button</button>
Note that you can have another "normal" script tag, in the component.
Now other components can import Button, which is the default export, and the changeColor function too:
<script>
import Button, { changeColor } from './Button.svelte'
</script>
Now that is probably a silly example, but knowing you have this functionality at your disposal can be quite helpful.
Handling State in Svelte
Every component, in addition to defining the markup, the CSS and the JavaScript logic, can host its own state.
What is state? State is any data that's needed to make the component render what it's rendering.
For example, if a form input field has the string "test" written into it, there'll be a variable somewhere holding this value. That's the state of the input field.
The field is selected? A variable somewhere will register this fact. And so on.
State is hosted in the script part of a component:
<script>
let count = 0
</script>
Now, if you come from other frameworks in the frontend space like Vue or React, you might think "how do I update this value?" - and for a good reason, as those frameworks make this operation rather unintuitive, I'd say.
One great thing about Svelte is that you don't need to do anything special to update the state of a component.
All you need is an assignment. A simple JavaScript assignment, using the = operator for example.
Say you have a count variable. You can increment that using, simply, count = count + 1, or count++:
<script>
let count = 0

const incrementCount = () => {
  count++
}
</script>

{count} <button on:click={incrementCount}>+1</button>
This is nothing groundbreaking if you are unfamiliar with how modern Web frameworks handle state. But in React you'd have to either call this.setState(), or use the useState() hook.
Vue takes a more structured approach using classes and the data property.
Having used both, I find Svelte to be a much more JavaScript-like syntax.
We need to be aware of one thing, which is learned pretty quickly: we must also make an assignment when changing the value.
Svelte always wants an assignment, otherwise it might not recognize that the state changed.
For simple values like strings and numbers, that's mostly a given, because all methods on String return new strings, and same for numbers - they are immutable.
But for arrays? We can't use methods that alter the array. Like push(), pop(), shift(), splice()... because there's no assignment. They change the inner data structure, but Svelte can't detect that.
Well, you can still use them, but after you've done your operation, you reassign the variable to itself, like this:
let list = [1, 2, 3]
list.push(4)
list = list
Which is a bit counter-intuitive, but you'll quickly remember it.
Or you can use use the spread operator to perform operations:
let list = [1, 2, 3]
list = [...list, 4]
Svelte Reactivity
In Svelte you can listen for changes in the component state, and update other variables.
For example if you have a count variable:
<script>
let count = 0
</script>
and you update it by clicking a button:
<script>
let count = 0

const incrementCount = () => {
  count = count + 1
}
</script>

{count} <button on:click={incrementCount}>+1</button>
You can listen for changes on count using the special syntax $: which defines a new block that Svelte will re-run when any variable referenced into it changes.
Here's an example:
<script>
let count = 0

const incrementCount = () => {
  count = count + 1
}

$: console.log(`${count}`)
</script>

{count} <button on:click={incrementCount}>+1</button>
I used the block:
$: console.log(`${count}`)You can write more than one of them:
<script>
$: console.log(`the count is ${count}`)
$: console.log(`double the count is ${count * 2}`)
</script>
And you can also add a block to group more than one statement:
<script>
$: {
  console.log(`the count is ${count}`)
  console.log(`double the count is ${count * 2}`)
}
</script>
I used a console.log() call in there, but you can update other variables too:
<script>
let count = 0
let double = 0

$: {
  console.log(`the count is ${count}`)
  double = count * 2
  console.log(`double the count is ${double}`)
}
</script>
Svelte Props
You can import a Svelte component into any other component using the syntax import ComponentName from 'componentPath':
<script>
import SignupForm from './SignupForm.svelte';
</script>
The path is relative to the current component path. ./ means "this same folder". You'd use ../ to go back one folder, and so on.
Once you do so, you can use the newly imported component in the markup, like an HTML tag:
<SignupForm />In this way, you are forming a parent/child relationship between the two components: the one that imports, and the one that is imported.
Often you want to have the parent component pass data to the child component.
You can do so using props. Props behave similarly to attributes in plain HTML, and they are a one-way form of communication.
In this example we pass the disabled prop, passing the JavaScript value true to it:
<SignupForm disabled={true}/>In the SignupForm component, you need to export the disabled prop, in this way:
<script>
  export let disabled
</script>
This is the way you express the fact that the prop is exposed to parent components.
When using the component, you can pass a variable instead of a value, to change it dynamically:
<script>
import SignupForm from './SignupForm.svelte';
let disabled = true
</script>

<SignupForm disabled={disabled}/>
When the disabled variable value changes, the child component will be updated with the new prop value. Example:
<script>
import SignupForm from './SignupForm.svelte';
let disabled = true
setTimeout(() => { disabled = false }, 2000)
</script>

<SignupForm disabled={disabled}/>
Cross-component State Management in Svelte
We've already seen how Svelte makes handling the state of a single component very easy.
But how do we pass state around across components?
Passing state around using props
The first strategy is common to other UI frameworks, and it's passing state around using props, lifting the state up.
When a component needs to share data with another, the state can be moved up in the components tree until there's a common parent to those components.
The state needs to be passed down until it reaches all the components that need this state information.
This is done using props, and it's a technique that I think is the best as it's simple.
The context API
However, there are cases where props are not practical. Perhaps 2 components are so distant in the components tree that we'd have to move state up to the top-level component.
In this case, another technique can be used called context API. It's ideal when you want to let multiple components communicate with descendants, but you don't want to pass props around.
The context API is provided by 2 functions which are provided by the svelte package: getContext and setContext.
You set an object in the context, associating it to a key:
<script>
import { setContext } from 'svelte'

const someObject = {}

setContext('someKey', someObject)
</script>
In another component you can use getContext to retrieve the object assigned to a key:
<script>
import { getContext } from 'svelte'

const someObject = getContext('someKey')
</script>
You can only use getContext to retrieve a key either in the component that used setContext or in one of its descendants.
If you want to let two components living in 2 different component trees communicate there's another tool for us: stores.
Using Svelte stores
Svelte stores are a great tool to handle your app state when components need to talk to each other without passing props around too much.
You must first import writable from svelte/store:
import { writable } from 'svelte/store'and create a store variable using the writable() function, passing the default value as the first argument:
const username = writable('Guest')This can be put into a separate file which you can import into multiple components, for example, called store.js (it's not a component, so it can be in a .js file instead of .svelte):
import { writable } from 'svelte/store'
export const username = writable('Guest')
Any other component now loading this file can access the store:
<script>
import { username } from './store.js'
</script>
Now the value of this variable can be set to a new value using set(), passing the new value as the first argument:
username.set('new username')And it can be updated using the update() function, which differs from set() because you don't just pass the new value to it - you run a callback function that is passed the current value as its argument:
const newUsername = 'new username!'
username.update(existing => newUsername)
You can add more logic here:
username.update(existing => {
  console.log(`Updating username from ${existing} to ${newUsername}`)
  return newUsername
})
To get the value of the store variable once, you can use the get() function exported by svelte/store:
import { writable, get } from 'svelte/store'
export const username = writable('Guest')
get(username) //'Guest'
To create a reactive variable that's updated whenever the store value changes instead, you can prepend the store variable using $ (in this example $username). Using that will make the component re-render whenever the stored value changes.
Svelte considers
$to be a reserved value and will prevent you from using it for things that are not related to stores values (which might lead to confusion). So if you are used to prepending DOM references using$, don't do it in Svelte.
Another option, best suited if you need to execute some logic when the variable changes, is to use the subscribe() method of username:
username.subscribe(newValue => {
  console.log(newValue)
})
In addition to writable stores, Svelte provides 2 special kinds of stores: readable stores and derived stores.
Svelte Readable Stores
Readable stores are special because they can't be updated from the outside - there's no set() or update() method. Instead, once you set the initial state, they can't be modified from the outside.
The official Svelte docs show an interesting example using a timer to update a date. I can think of setting up a timer to fetch a resource from the network, perform an API call, get data from the filesystem (using a local Node.js server) or anything else that can be set up autonomously.
In this case, instead of using writable() to initialize the store variable, we use readable():
import { readable } from 'svelte/store'
export const count = readable(0)
You can provide a function after the default value that will be responsible for updating it. This function receives the set function to modify the value:
<script>
import { readable } from 'svelte/store'
export const count = readable(0, set => {
  setTimeout(() => {
    set(1)
  }, 1000)
})
</script>
In this case, we update the value from 0 to 1 after 1 second.
You can setup an interval in this function, too:
import { readable, get } from 'svelte/store'
export const count = readable(0, set => {
  setInterval(() => {
    set(get(count) + 1)
  }, 1000)
})
You can use this in another component like this:
<script>
import { count } from './store.js'
</script>

{$count}
Svelte Derived Stores
A derived store allows you to create a new store value that depends on the value of an existing store.
You can do so using the derived() function exported by svelte/store which takes as its first parameter the existing store value, and as a second parameter a function which receives that store value as its first parameter:
import { writable, derived } from 'svelte/store'

export const username = writable('Guest')

export const welcomeMessage = derived(username, $username => {
  return `Welcome ${$username}`
})


<script>
import { username, welcomeMessage } from './store.js'
</script>

{$username}
{$welcomeMessage}
Svelte Slots
Slots are a handy way to let you define components that can be composed together.
And vice versa, depending on your point of view, slots are a handy way to configure a component you are importing.
Here's how they work.
In a component you can define a slot using the <slot /> (or <slot></slot>) syntax.
Here's a Button.svelte component that simply prints a <button> HTML tag:
<button><slot /></button>For React developers, this is basically the same as <button>{props.children}</button>
Any component importing it can define content that is going to be put into the slot by adding it into the component's opening and closing tags:
<script>
import Button from './Button.svelte'
</script>

<Button>Insert this into the slot</Button>
You can define a default, which is used if the slot is not filled:
<button>
  <slot>
    Default text for the button
  </slot>
</button>
You can have more than one slot in a component, and you can distinguish one from the other using named slots. The single unnamed slot will be the default one:
<slot name="before" />
<button>
  <slot />
</button>
<slot name="after" />
Here's how you would use it:
<script>
import Button from './Button.svelte'
</script>

<Button>
  Insert this into the slot
  <p slot="before">Add this before</p>
  <p slot="after">Add this after</p>
</Button>
And this would render the following to the DOM:
<p slot="before">Add this before</p>
<button>
  Insert this into the slot
</button>
<p slot="after">Add this after</p>
Svelte Lifecycle Events
Every component in Svelte fires several lifecycle events that we can hook on, to help us implement the functionality we have in mind.
In particular, we have
onMountfired after the component is renderedonDestroyfired after the component is destroyedbeforeUpdatefired before the DOM is updatedafterUpdatefired after the DOM is updated
We can schedule functions to happen when these events are fired by Svelte.
We don't have access to any of those methods by default, but we need to import them from the svelte package:
<script>
  import { onMount, onDestroy, beforeUpdate, afterUpdate } from 'svelte'
</script>
A common scenario for onMount is to fetch data from other sources.
Here's a sample usage of onMount:
<script>
  import { onMount } from 'svelte'

  onMount(async () => {
    //do something on mount
  })
</script>
onDestroy allows us to clean up data or stop any operation we might have started at the component initialization, like timers or scheduled periodic functions using setInterval.
One particular thing to notice is that if we return a function from onMount, that serves the same functionality of onDestroy - it's run when the component is destroyed:
<script>
  import { onMount } from 'svelte'

  onMount(async () => {
    //do something on mount

    return () => {
      //do something on destroy
    }
  })
</script>
Here's a practical example that sets a periodic function to run on mount, and removes it on destroy:
<script>
  import { onMount } from 'svelte'

  onMount(async () => {
    const interval = setInterval(() => {
      console.log('hey, just checking!')
    }, 1000)

    return () => {
      clearInterval(interval)
    }
  })
</script>
Svelte Bindings
Using Svelte you can create a two-way binding between data and the UI.
Many other Web frameworks can provide two-way bindings, it's a very common pattern.
They are especially useful with forms.
bind:value
Let's start with the most common form of binding you'll often use, which you can apply using bind:value. You take a variable from the component state, and you bind it to a form field:
<script>
let name = ''
</script>

<input bind:value={name}>
Now if name changes, the input field will update its value. And the opposite is true, as well: if the form is updated by the user, the name variable value changes.
Just be aware that the variable must be defined using let/var and not const, otherwise it can't be updated by Svelte, as const defines a variable with a value that can't be reassigned.
bind:value works on all flavors of input fields (type="number", type="email" and so on), but it also works for other kind of fields, like textarea and select (more on select later).
Checkboxes and radio buttons
Checkboxes and radio inputs (input elements with type="checkbox" or type="radio") allow those 3 bindings:
bind:checkedbind:groupbind:indeterminate
bind:checked allows us to bind a value to the checked state of the element:
<script>
let isChecked
</script>

<input type=checkbox bind:checked={isChecked}>
bind:group is handy with checkboxes and radio inputs, because those are very often used in groups. Using bind:group you can associate a JavaScript array to a list of checkboxes, and have it populated based on the choices made by the user.
Here's an example. The goodDogs array populates based on the checkboxes I tick:
<script>
let goodDogs = []
let dogs = ['Roger', 'Syd']
</script>

<h2>
  Who's a good dog?
</h2>

<ul>
  {#each dogs as dog}
    <li>{dog} <input type=checkbox bind:group={goodDogs} value={dog}></li>
  {/each}
</ul>

<h2>
  Good dogs according to me:
</h2>

<ul>
  {#each goodDogs as dog}
    <li>{dog}</li>
  {/each}
</ul>
See the example on https://svelte.dev/repl/059c1b5edffc4b058ad36301dd7a1a58
bind:indeterminate allows us to bind to the indeterminate state of an element (if you want to learn more head to https://css-tricks.com/indeterminate-checkboxes/).
Select fields
bind:value also works for the select form field to get the selected value automatically assigned to the value of a variable:
<script>
let selected
</script>

<select bind:value={selected}>
  <option value="1">1</option>
  <option value="2">2</option>
  <option value="3">3</option>
</select>

{selected}
The cool thing is that if you generate options dynamically from an array of objects, the selected option is now an object, not a string:
<script>
let selected

const goodDogs = [
  { name: 'Roger' },
  { name: 'Syd' }
]
</script>

<h2>List of possible good dogs:</h2>
<select bind:value={selected}>
  {#each goodDogs as goodDog}
    <option value={goodDog}>{goodDog.name}</option>
  {/each}
</select>

{#if selected}
<h2>
  Good dog selected: {selected.name}
</h2>
{/if}
See example: https://svelte.dev/repl/7e06f9b7becd4c57880db5ed184ea0f3
select also allows the multiple attribute:
<script>
let selected = []

const goodDogs = [
  { name: 'Roger' },
  { name: 'Syd' }
]
</script>

<h2>List of possible good dogs:</h2>
<select multiple bind:value={selected}>
  {#each goodDogs as goodDog}
    <option value={goodDog}>{goodDog.name}</option>
  {/each}
</select>

{#if selected.length}
<h2>Good dog selected:</h2>
<ul>
  {#each selected as dog}
    <li>{dog.name}</li>
  {/each}
</ul>
{/if}
See example: https://svelte.dev/repl/b003248e87f04919a2f9fed63dbdab8c
Other bindings
Depending on the HTML tag you are working on, you can apply different kinds of bindings.
bind:files is a binding valid on type="file" input elements, to bind the list of selected files.
The details HTML element allows the use of bind:open to bind its open/close value.
The audio and video media HTML tags allow us to bind several of their properties: currentTime, duration, paused, buffered, seekable, played, volume, playbackRate.
textContent and innerHTML can be bound on contenteditable fields.
All very useful things for those specific HTML elements.
Read-only bindings
offsetWidth, offsetHeight, clientWidth, clientHeight can be bound, read only, on any block level HTML element, excluding void tags (like br) and elements that are set to be inline (display: inline).
Get a reference to the HTML element in JavaScript
bind:this is a special kind of binding that allows you to get a reference to an HTML element and bind it to a JavaScript variable:
<script>
let myInputField
</script>

<input bind:this={myInputField} />
This is handy when you need to apply logic to elements after you mount them, for example, using the onMount() lifecycle event callback.
Binding components props
Using bind: you can bind a value to any prop that a component exposes.
Say you have a Car.svelte component:
<script>
export let inMovement = false
</script>

<button on:click={() => inMovement = true }>Start car</button>
You can import the component and bind the inMovement prop:
<script>
  import Car from './Car.svelte';

  let carInMovement;
</script>

<Car bind:inMovement={carInMovement} />

{carInMovement}
This can allow for interesting scenarios.
Conditional Logic in Templates
In a Svelte component, when it comes to rendering HTML you can work with some specific syntax to craft the UI you need at every stage of the application lifecycle.
In particular, we'll now explore conditional structures.
The problem is this: you want to be able to look at a value/expression, and if that points to a true value do something, if that points to a false value then do something else.
Svelte provides us a very powerful set of control structures.
The first is if:
{#if isRed}
  <p>Red</p>
{/if}
There is an opening {#if} and an ending {/if}. The opening markup checks for a value or statement to be truthy. In this case isRed can be a boolean with a true value:
<script>
let isRed = true
</script>
An empty string is falsy, but a string with some content is truthy.
0 is falsy, but a number > 0 is truthy.
The boolean value true is truthy, of course, and false is falsy.
If the opening markup is not satisfied (a falsy value is provided), then nothing happens.
To do something else if that's not satisfied, we use the appropriately called else statement:
{#if isRed}
  <p>Red</p>
{:else}
  <p>Not red</p>
{/if}
Either the first block is rendered in the template or the second one. There's no other option.
You can use any JavaScript expression into the if block condition, so you can negate an option using the ! operator:
{#if !isRed}
  <p>Not red</p>
{:else}
  <p>Red</p>
{/if}
Now, inside the else you might want to check for an additional condition. That's where the {:else if somethingElse} syntax comes along:
{#if isRed}
  <p>Red</p>
{:else if isGreen}
  <p>Green</p>
{:else}
  <p>Not red nor green</p>
{/if}
You can have many of these blocks, not just one, and you can nest them. Here's a more complex example:
{#if isRed}
  <p>Red</p>
{:else if isGreen}
  <p>Green</p>
{:else if isBlue}
  <p>It is blue</p>
{:else}
  {#if isDog}
    <p>It is a dog</p>
  {/if}
{/if}
Looping in Svelte Templates
In Svelte templates you can create a loop using the {#each}{/each} syntax:
<script>
let goodDogs = ['Roger', 'Syd']
</script>

{#each goodDogs as goodDog}
  <li>{goodDog}</li>
{/each}
If you are familiar with other frameworks that use templates, it's a very similar syntax.
You can get the index of the iteration using:
<script>
let goodDogs = ['Roger', 'Syd']
</script>

{#each goodDogs as goodDog, index}
  <li>{index}: {goodDog}</li>
{/each}
(indexes start at 0)
When dynamically editing the lists removing and adding elements, you should always pass an identifier in lists to prevent issues.
You do so using this syntax:
<script>
let goodDogs = ['Roger', 'Syd']
</script>

{#each goodDogs as goodDog (goodDog)}
  <li>{goodDog}</li>
{/each}

<!-- with the index -->
{#each goodDogs as goodDog, index (goodDog)}
  <li>{goodDog}</li>
{/each}
You can pass an object, too, but if your list has a unique identifier for each element, it's best to use it:
<script>
let goodDogs = [
  { id: 1, name: 'Roger'},
  { id: 2, name: 'Syd'}
]
</script>

{#each goodDogs as goodDog (goodDog.id)}
  <li>{goodDog.name}</li>
{/each}

<!-- with the index -->
{#each goodDogs as goodDog, index (goodDog.id)}
  <li>{goodDog.name}</li>
{/each}
Promises in Svelte Templates
Promises are an awesome tool we have at our disposal to work with asynchronous events in JavaScript.
The relatively recent introduction of the await syntax in ES2017 made using promises even simpler.
Svelte gives us the {#await} syntax in templates to directly work with promises at the template level.
We can wait for promises to resolve, and define a different UI for the various states of a promise: unresolved, resolved, and rejected.
Here's how it works. We define a promise, and using the {#await} block we wait for it to resolve.
Once the promise resolves, the result is passed to the {:then} block:
<script>
  const fetchImage = (async () => {
    const response = await fetch('https://dog.ceo/api/breeds/image/random')
    return await response.json()
  })()
</script>

{#await fetchImage}
  <p>...waiting</p>
{:then data}
  <img src={data.message} alt="Dog image" />
{/await}
You can detect a promise rejection by adding a {:catch} block:
{#await fetchImage}
  <p>...waiting</p>
{:then data}
  <img src={data.message} alt="Dog image" />
{:catch error}
  <p>An error occurred!</p>
{/await}
Run the example: https://svelte.dev/repl/70e61d6cc91345cdaca2db9b7077a941
Working with Events in Svelte
Listening to DOM events
In Svelte you can define a listener for a DOM event directly in the template, using the on:<event> syntax.
For example, to listen to the click event, you will pass a function to the on:click attribute.
To listen to the onmousemove event, you'll pass a function to the on:mousemove attribute.
Here's an example with the handling function defined inline:
<button on:click={() => {
  alert('clicked')
}}>Click me</button>
and here's another example with the handling function defined in the script section of the component:
<script>
const doSomething = () => {
  alert('clicked')
}
</script>

<button on:click={doSomething}>Click me</button>
I prefer inline when the code is not too verbose. If it's just 2-3 lines, for example - otherwise I'd move that up in the script section.
Svelte passes the event handler as the argument of the function, which is handy if you need to stop propagation or to reference something in the Event object:
<script>
const doSomething = event => {
  console.log(event)
  alert('clicked')
}
</script>

<button on:click={doSomething}>Click me</button>
Now, I mentioned "stop propagation". That's a very common thing to do, to stop form submit events for example. Svelte provides us modifiers, a way to apply it directly without manually doing it.
stopPropagation and preventDefault are the 2 modifiers you'll use the most, I think.
You apply a modifier like this: <button on:click|stopPropagation|preventDefault={doSomething}>Click me</button>
There are other modifiers, which are more niche. capture enables capturing events instead of bubbling, once only fires the event once, self only fires the event if the target of the event is this object (removing it from the bubbling/capturing hierarchy).
Creating your events in components
What's interesting is that we can create custom events in components, and use the same syntax of built-in DOM events.
To do so, we must import the createEventDispatcher function from the svelte package and call it to get an event dispatcher:
<script>
  import { createEventDispatcher } from 'svelte'
  const dispatch = createEventDispatcher()
</script>
Once we do so, we can call the dispatch() function, passing a string that identifies the event (which we'll use for the on: syntax in other components that use this):
<script>
  import { createEventDispatcher } from 'svelte'
  const dispatch = createEventDispatcher()

  //when it's time to trigger the event
  dispatch('eventName')
</script>
Now other components can use ours using
<ComponentName on:eventName={event => {
  //do something
}} />
You can also pass an object to the event, passing a second parameter to dispatch():
<script>
  import { createEventDispatcher } from 'svelte'
  const dispatch = createEventDispatcher()
  const value = 'something'

  //when it's time to trigger the event
  dispatch('eventName', value)

  //or

  dispatch('eventName', {
    someProperty: value
  })
</script>
the object passed by dispatch() is available on the event object.
Where Do We Go From Here
I hope this little handbook was useful to shine a light on what Svelte can do for you, and I hope you are now interested to learn more about it!

Comments